Connecting First Device
In the previous guide, we worked through our emulated data and saw the dashboard in action. Now it's time to connect a custom device and see its data flowing through the system.
Enroll a Device
To get started with a device, simply enter a device name and enroll it.

We'll start off with a symmetric key protected device, and can move to other security in the future. Once created, the connection string will be available for use in the next steps.

Send Device Data
At times, the IoT process can feel like a challenge. We've done a lot to springboard cloud-native IoT adoption, but now we need to get actual hardware sending data. At scale, there is more to do, but we'll get going with the basics first.
Best Practice IoT Ensemble Schema
When starting with our shared plans, to get the most out of the system, there is a best practice schema that we recommend using to send IoT messages. This allows for the collection of device data, sensor readings, and sensor metadata to deliver a rich, pre-configured IoT experience. In short, the structure is as follows:
{
    "DeviceID": "{your-device-id}",
    "DeviceType": "{your-device-type}",
    "Version": "{your-message-version}",
    "Timestamp": "{telemetry-timestamp}",
    "DeviceData": {
        "PropertyName": {valid-json-value},
        ...
    },
    "SensorReadings": {
        "PropertyName": {number},
        ...
    },
    "SensorMetadata": {
        "_": {
            "PropertyName": {number 0-1.0},
            ...
        },
        "{SensorReadingPropertyName}": {
            "PropertyName": {number 0-1.0},
            ...
        }
    },
}
Here is a brief explanation of our best practice schema and how to use it:
- DeviceID, DeviceType, Version
These values are under your control and should be strings. The Device ID is required and we recommend using the Device Name from the devices created (though not required). The DeviceType and Version are optional, though recommended to properly work with historic data. - Timestamp
To properly sequence the messages sent from device to cloud, a timestamp is required. It should be in the __ format as shown in the example below. - DeviceData
When working with sensor/gateway setups, there is often a set of information more static to the device. This could be latitudue and longitude information, building information, or anything else that isn't a sensor reading. - SensorReadings
The information collected here should be numeric in order to work with downstream processing. If the sensor is not returning numeric values, they should be converted on the client side. - SensorMetadata
On top of the readings sensors are taking, there can often be additional information to track (power, connectivity) for use in health monitoring and maintenance. These values should be numeric and represent any valid number between 0 and 1 where 1 represents fully functioning and 0 represents not working. As an example, a battery that is fully charged would be set to 1, where as a depleted battery would be set to 0.- _
This special property on the SensorMetadata allows sending information relating to a gateway or other non-sensor health information.
- _
We do have a detailed explanation of the best practice schema if you need more information on how to use it from a custom device. Here is a full example of what the telemetry payload would look like (as used by our emulated device):
{
    "DeviceID":"Emulated-4",
    "DeviceType":"Generic",
    "Timestamp":"2020-12-10T00:26:30.0217778+00:00",
    "Version":"0.0.2",
    "DeviceData": {
        "Latitude": 40.7578,
        "Longitude": -104.9733,
        "Floor": 2,
        "Room": "Conference Room 5"
    },
    "SensorReadings": {
        "Temperature": 105,
        "Humidity": 83,
        "Occupancy": 8,
        "Occupied": 1
    },
    "SensorMetadata": {
        "_": {
            "SignalStrength": 1
        },
        "Temperature": {
            "Battery": 0.4
        }
    },
}
If not using the best practice schema, data will still be accessible throughout the system. However, some more advanced features won't be accessible.
Basics of Connecting
With an understanding of the device schema options, connecting is fairly straight forward. The following connection quick starts will walk through some initial ways to get data flowing, then dig into more complex connection scenarios.
All that's needed for the following sections is the device connection string. Copy it from the dashboard, after creating a first device, using the ![]() button.
button.

When connecting devices, the connection is to a cloud-native Azure IoT Hub. We don't place any technology between the device and the IoT Hub, making it possible to develop solutions with the full capabilities of Azure IoT Hub. Read more on how to connect devices using the connection string.
Connection Quick Starts
Starting off simple, then working up to some real device connection examples, we'll walk through some common connection workflows. Check out our detailed guide on device setup for more ways to connect and get data flowing.
Send Via Dashboard
Using the send device message form from the dashboard is the easiest way to start seeing what data for devices would look like throughout the system. To open up the form, go to the ![]() Devices Telemetry section and at the bottom click the
Devices Telemetry section and at the bottom click the  button.
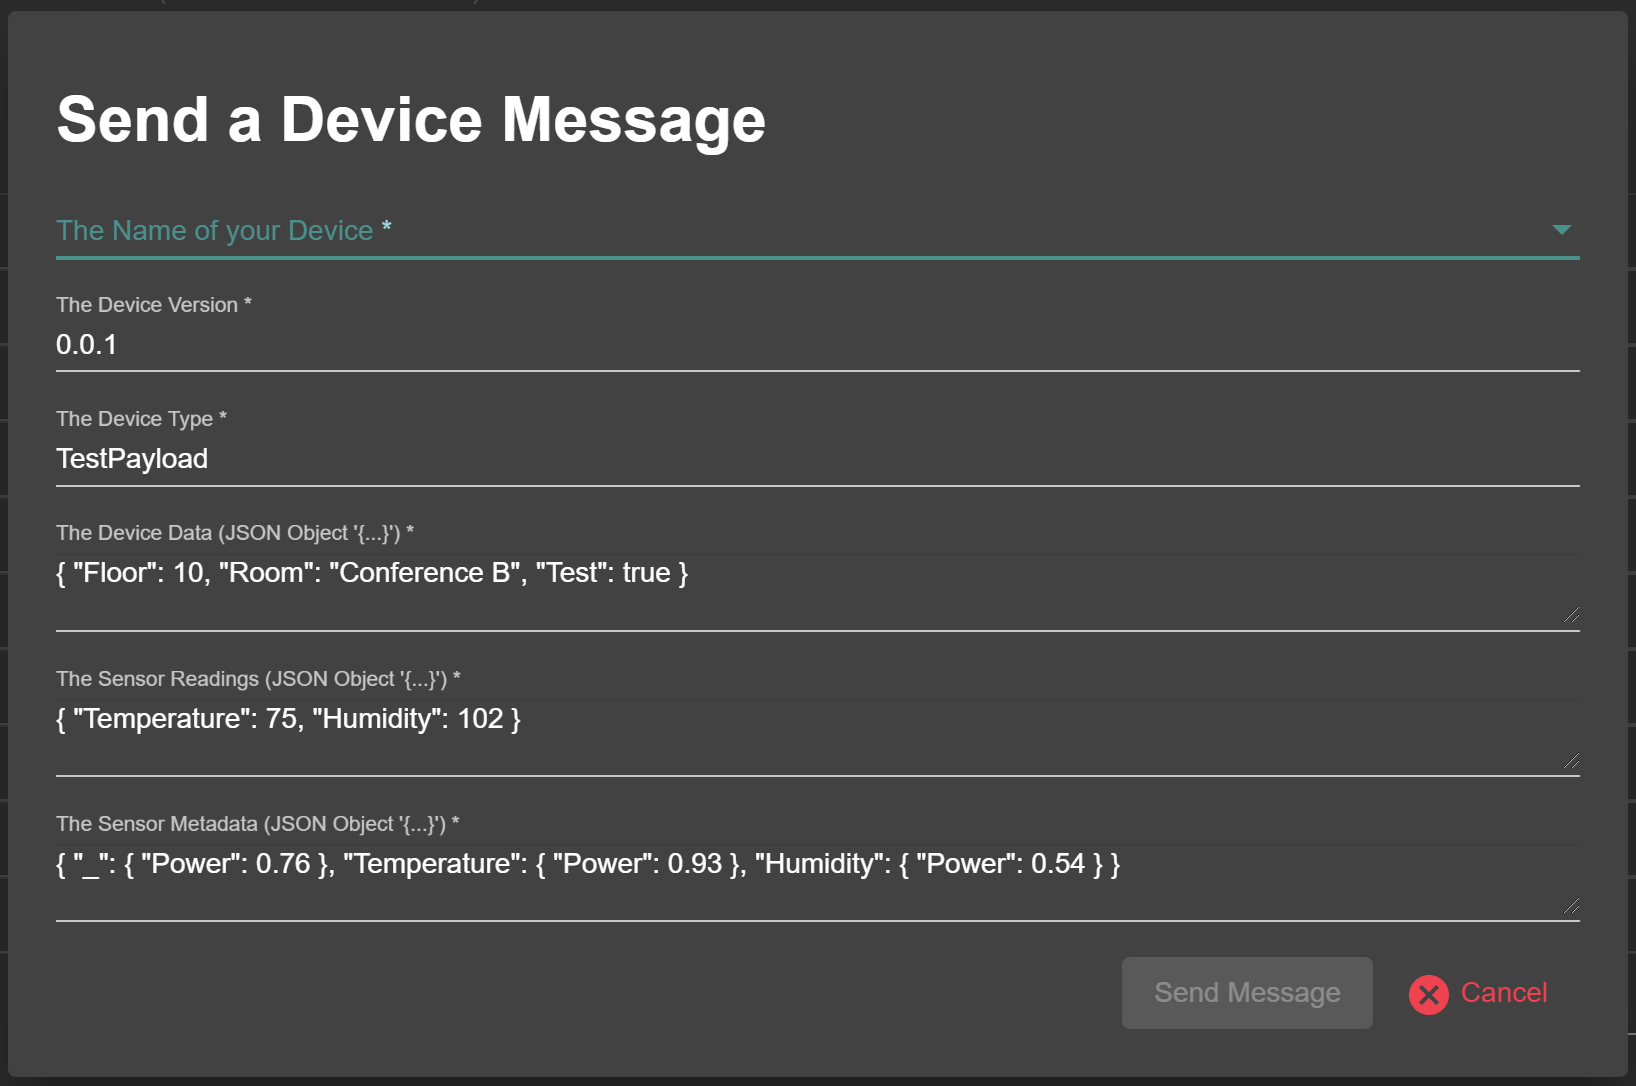
Once opened, select the device to send from and adjust any of the values. Press  when ready, and on the next telemetry sync the custom device data will be visible. The telemetry table is only one way to see data, read on for more details on viewing device data.
Send Via HTTP
Next, a look at how to use HTTP to send a device-to-cloud message. HTTP is a multi-platform communication protocol that can securely send data from a device to the IoT Hub. Here we'll layout how to use the connection string to generate an HTTP request to send data to the Azure IoT Hub. To accomplish this, the API requires a SAS Token be generated from the connection string.
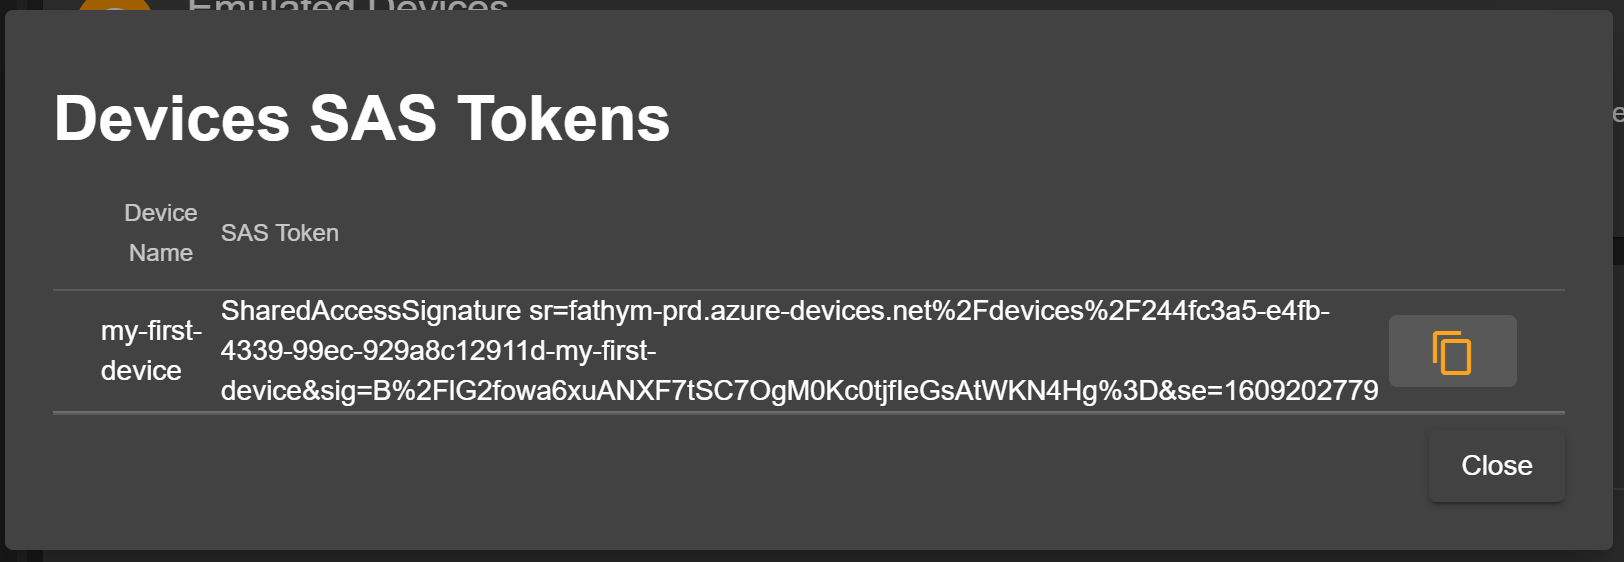
The easiest way to try out an HTTP request, with valid SAS Token, is to grab a SAS Token from the dashboard (only good for 1 hour). Use the ![]() button to open a dialog where the
button to open a dialog where the ![]() button will copy the SAS Token signature.
button will copy the SAS Token signature.
With SAS Token in hand, we can execute a curl command like the following to send a device message. Continue reading for a complete guide on sending messages with HTTP.
curl -X POST \
  https://fathym-prd.azure-devices.net/devices/{device-id}/messages/events?api-version=2018-06-30 \
  -H 'Authorization: {sas-token}' \
  -H 'Content-Type: application/json' \
  -d '{
    "DeviceID":"{device-name}",
    "DeviceType":"Generic",
    "Timestamp":"2020-12-10T00:26:30.0217778+00:00",
    "Version":"0.0.2",
    "DeviceData": {
        "Latitude": 40.7578,
        "Longitude": -104.9733,
        "Floor": 2,
        "Room": "Conference Room 5"
    },
    "SensorReadings": {
        "Temperature": 105,
        "Humidity": 83,
        "Occupancy": 8,
        "Occupied": 1
    },
    "SensorMetadata": {
        "_": {
            "SignalStrength": 1
        },
        "Temperature": {
            "Battery": 0.4
        }
    },
}'
There are a couple of values to replace, and adust the payload as desired. Here is a description on where to find the values for replacement.
- {device-id}
The {device-id} can be located in the connection string, and is the value after "DeviceId=" prior to the ";". Set this value in the path to ensure messages are sent to the correct device. - {sas-token}
The {sas-token} is the value copied from the dialog in the previous step, this is the complete SharedAccessSignature. - {device-name}
The {device-name} can be any unique value, though it is recommended to use the Device Name from the created devices in the dashboard.
The same information can be used to execute requests from Postman or custom devices.